

Important note: This guide is intended for users whose appliance no longer boots due to file system corruption or a software failure. Follow these steps carefully to bring your hardware back into production in less than 30 minutes.
Introduction
Rack Matrix security appliances come ready to use with pfSense pre-installed. However, a sudden power outage or file system corruption can sometimes prevent the device from booting up.
Since all our appliances rely exclusively on a console port for physical administration, this step-by-step tutorial guides you through creating a specific installation USB drive and performing a full reinstallation of pfSense 2.7.2 via the serial connection—without the need to create an account or register on the Netgate purchase portal.
Prerequisites
Before starting, ensure you have the following items:
-
A blank USB flash drive with a minimum capacity of 4 GB.
-
A computer (Windows, Mac, or Linux) with Internet access.
-
A serial console cable to connect to the Rack Matrix appliance.
-
Terminal emulation software (such as PuTTY on Windows or Tera Term).
Step 1: Downloading the pfSense 2.7.2 series image
To simplify the process and bypass the main site's mandatory login form, we use direct access to the download servers.
-
Open your web browser.
-
Download the official uncompressed image directly from the link on our website:
pfSense-CE-memstick-serial-2.7.2-RELEASE-amd64.img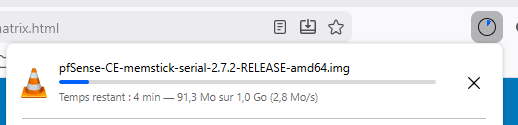
Step 2: Preparing the installation USB drive (Flashing)
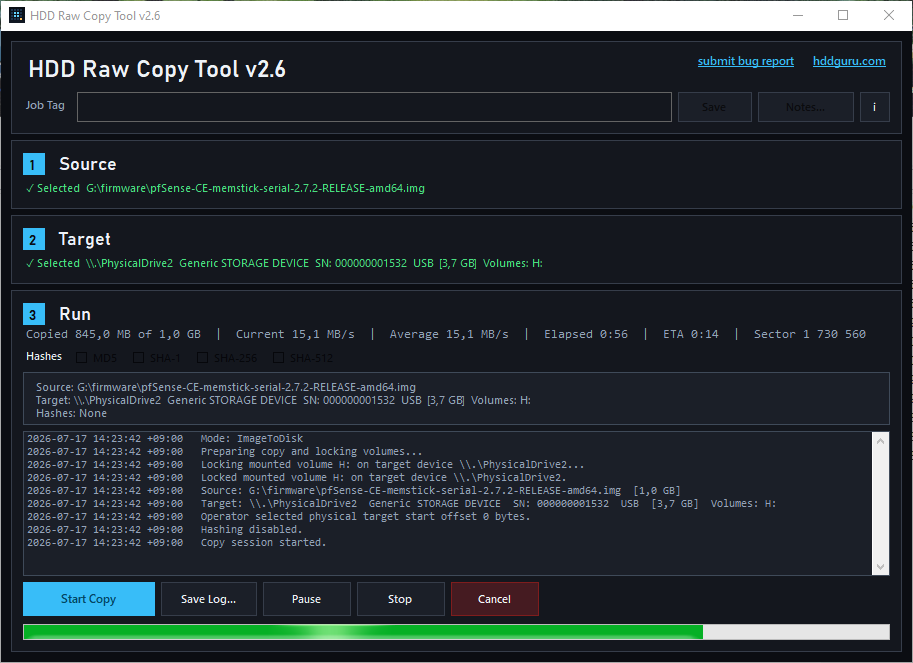
To copy the installation image to your USB drive in a bootable format, we recommend using the free software HDD raw copy Tool.
-
Connect your USB drive to your computer.
-
Launch HDD Raw Copy
-
Click Source and select the
.imgfile downloaded in the previous step. -
Click on Target and select your USB drive (be careful not to select one of your internal hard drives).
-
Click "Start copy" at the bottom left and wait for the writing process and the validation step to complete.
Step 3: Serial connection to the Rack Matrix appliance
-
Insert the freshly flashed USB drive into one of the USB ports on your Rack Matrix appliance (the device must be powered off).
-
Connect the console cable between the appliance's dedicated console port and an available USB port on your computer.
-
Open your terminal software (i.e. PuTTY, KiTTY).
-
Configure the serial connection session as follows:
-
Connection type : Serial
-
Serial line : COMX (replace X with your COM port number, which can be found in Windows Device Manager)
-
Speed (Baud rate) :
115200 -
Data bits :
8 -
Stop bits :
1 -
Parity :
None -
Flow control :
None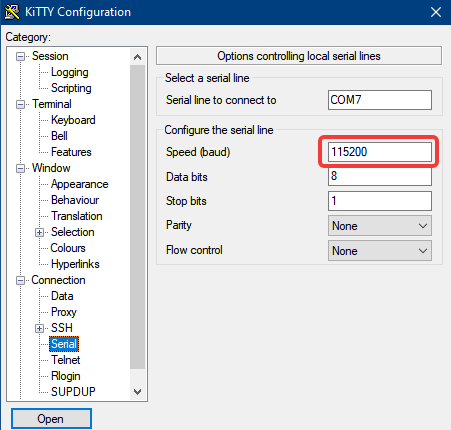
-
-
Click Open. A blank black terminal window appears on the screen.
Step 4: Startup and installation process
-
Power on your Rack Matrix appliance.
-
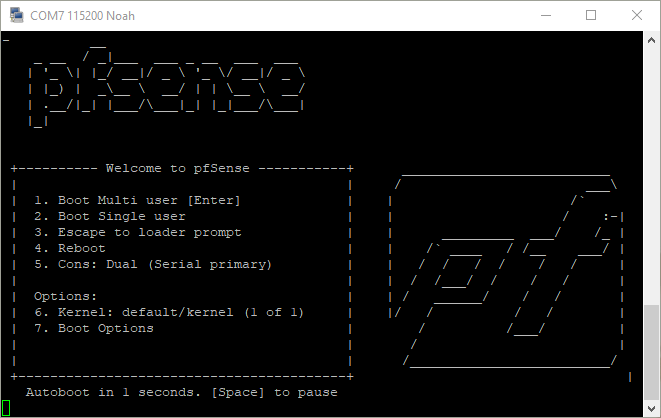
The text-based startup sequence appears immediately on your PuTTY terminal. The appliance is configured to boot automatically from the USB drive. If the system attempts to load the old, faulty installation, restart the appliance and repeatedly press the F10 key (or Delete, depending on the motherboard model) when the beep sounds to access the boot manager, then select your USB drive.
-
As soon as the pfSense text-based boot menu appears on the screen, either let the countdown finish or press Enter to launch the installation environment.
- Select the terminal type. It is usually VT100. This is already selected by default. Press
[Enter]to continue.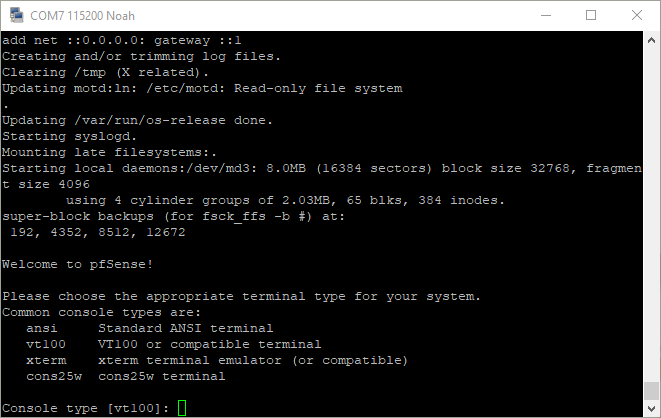
-
License acceptance: When the copyright banner appears, confirm by pressing
[Enter](Accept).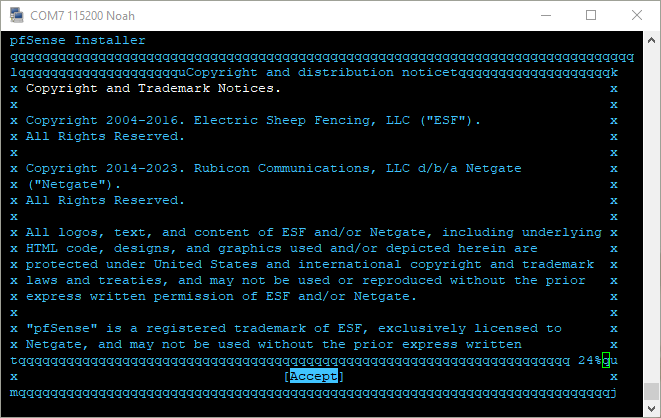
-
Main Menu: Select the "Install" option (Install pfSense) and confirm by pressing
[Enter].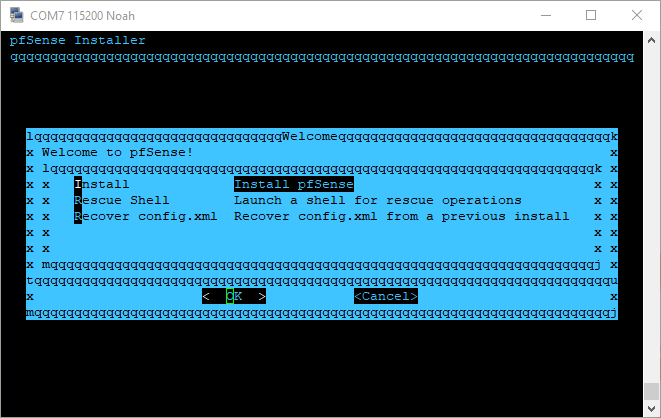
-
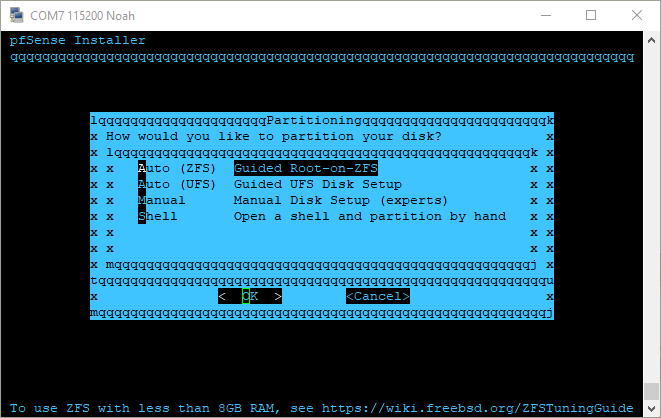
Partitioning: Select the recommended "Auto (ZFS)" option. The ZFS file system incorporates transactional logging mechanisms that protect the appliance against corruption resulting from a power failure.
-
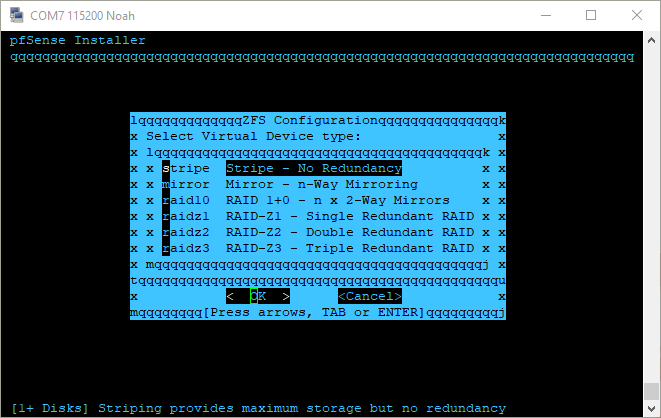
ZFS Options: Select Install and confirm "Stripe - No Redundancy" (unless your appliance is equipped with multiple physical disks configured as a mirror by default).
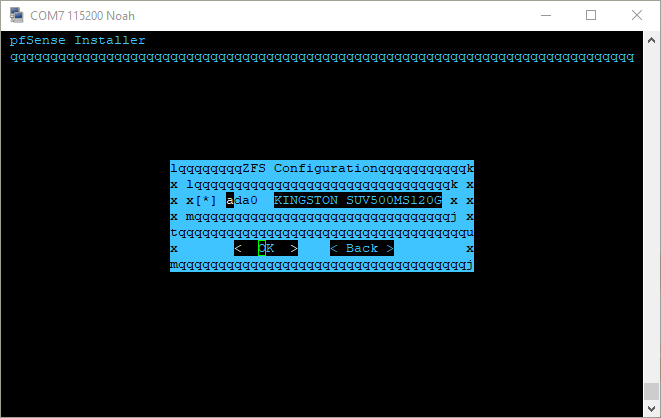
- Target disk selection: Select your appliance's internal storage medium (usually identified as
ada0orda0). Press the spacebar to select the disk (an asterisk * should appear), then press Enter to confirm. Be careful not to select your installation USB drive.
-
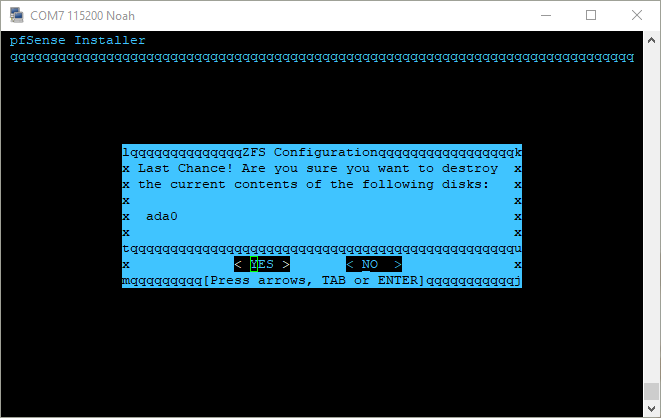
Confirmation: Select YES to confirm the permanent erasure of the defective disk and start copying the files.
Step 5: Finalization and Restart
-
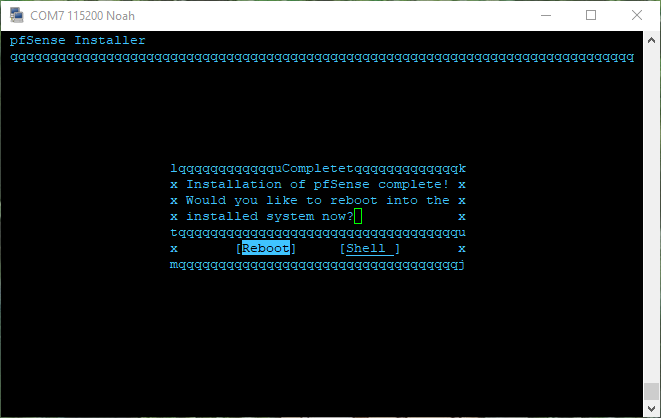
Once file extraction and writing are complete, the installer asks if you wish to open a command shell to apply manual changes. Select Reboot.
-
IMPORTANT: As soon as the terminal indicates that the system shutdown signal has been sent, immediately disconnect the USB drive from the appliance. If it remains connected, the device will repeatedly restart the installation process upon startup.
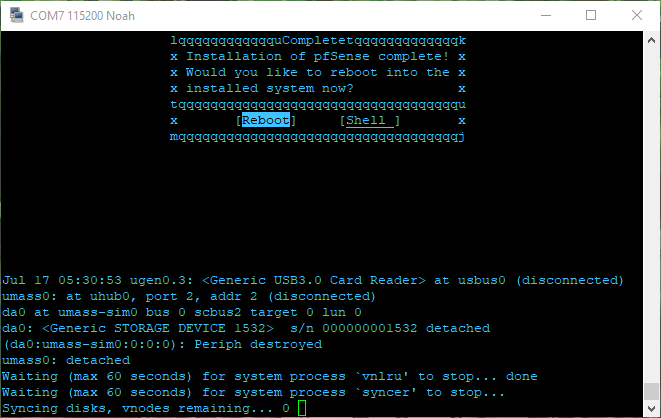
The appliance will execute its initial startup sequence directly from its freshly reset internal storage. 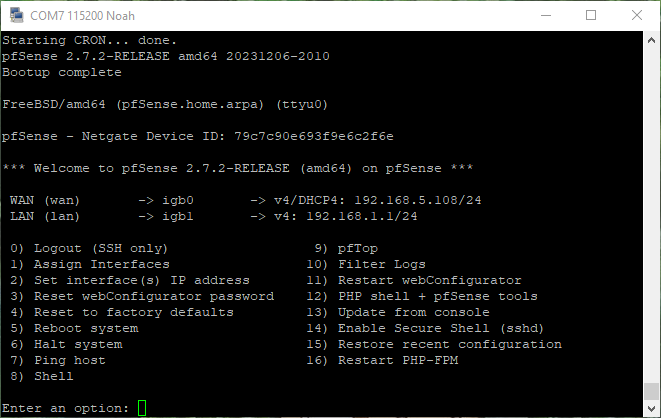
Your equipment is operational again and ready to receive your configuration backup.
Full installation video. From the initial startup to the final startup.
If you encounter any issues or abnormal behavior during the process, don't hesitate to contact us.